Why Manual Mode Is Important
This is a topic I take very seriously, so I'm going to start this blog with a very controversial statement:
You will never become a successful photographer if you don't know how to use manual mode.
Of course, this may irk some of you. You may think, "Well, I take good pictures on automatic, I don't need to learn manual mode." Manual mode on your camera isn't the same as manual transmission on a car, manual mode on your camera is analogous to knowing how to drive.
Understanding how to control the mechanics and relationships of your camera settings will make you a better photographer. Period.
Street Seen.
Let's take a step back here. By now you may have read my Exposure Series, where I outline the three pillars of exposure, and the purposes and consequences of each of them. This blog post is a companion piece, explaining less the mechanics of manual exposure, and more the philosophy. And yes, there's a philosophy to using manual mode. There's plenty of good reasons why you should use modes other than manual, such as aperture priority or shutter priority, but my strongest contention is that you should never use automatic mode. Again, a very absolute and controversial statement. What is philosophy without absolutes?
Linda in light.
Automatic mode is the inevitable conclusion to the goal of making photography effortless. This mode will make all of the determinations for you, aside from composition. It will calculate the optimal exposure for any given scene, whatever it may be. However, it's only doing this based on what the camera itself sees, not what you see. And therein lies the disadvantage of automatic mode. You are an artist. You look at a scene, a subject, a model, and your eye is drawn to something specific. A shape. A form. Texture. Shadows. Depth. Your camera doesn't see these things. Your camera looks at a scene, determines what you're focusing on, if it's a person or landscape, adjusts the aperture, shutter, and ISO so that you get a pleasing exposure. But what if you want to isolate your subject, using a low f-stop? Only you know that, your camera can't figure out that's your vision unless you manually set it.
Caricature of a caricaturist.
I understand that when you're on a shoot, or out street shooting, that speed is the key. You want to take the shot as fast as you can, before that panhandler's cat stops looking at you. Automatic mode makes exposure mindless. But it's a trick. A gamble. You leave it up to chance, and this is not how a successful photographer works. It's become much easier to be less disciplined thanks to digital camera, with the 24 exposure per roll limit a thing of the past, and burst mode that lets you take as many photos as you can in a short period of time. You can hope that one of those two advantages of digital photography will provide you with some good shots. But if not, there's always Photoshop.
All of the lights.
Yes. Photoshop. Just photoshop it. It's a great tool, I'll admit. But there is no tool that makes up for getting the image you want right out of the camera. Sure, it's easy to blur out backgrounds in Photoshop to your liking, but what about the foreground? That's a bit trickier, but when you do achieve a shallow depth of field when you shoot, you don't have to worry about it! When you tell the camera what to do, you don't have to finagle the image into looking like you want it to. It just does. You use your voice through the dials and switches on your camera, and you create the exact image you want. And you save yourself a lot of time editing, you don't have to take a sup-par image and bring it to where you want it. It just is.
Black and white.
The old saying goes, you have to know the rules before you can break them. When you understand the pillars of exposure, it becomes second nature. You'll fumble at first. You might miss the shot a few times. But when you speak the language of exposure, it becomes effortless. You'll reference the light meter, but if you want the scene to be overexposed, you'll know how to do it! You might need to take a few test shots and work out what you want to change, but that's better than having to change it in Photoshop. One thing to think about it that when you change exposure in Photoshop is that you're stretching the limits of the image, bringing out detail from the image that may or may not be present. If it's not present, Photoshop must compensate, and the way it does that is by creating noise.
A gateway.
Finally, I want to cover two other common camera modes. I like to think of them as semi-automatic, not quite manual, not quite automatic. Aperture priority is one such mode, it lets you select your aperture, then calculates what the shutter speed should be based on the scene. This is a speedy way to take photos where you know your desired depth of field. The other mode is Shutter Priority, sometimes called Time Value Priority, and it's the opposite: it lets you choose a shutter speed, but leaves f-stop up to what the camera thinks is best. This is good for sports or any kind of photography where you want the quickest shutter speed. And on most cameras, there's an Auto ISO mode that can be turned on in conjunction with Manual, Aperture Priority, or Shutter Priority modes. This takes ISO out of the equation, although I highly recommend forgetting you ever read about it, as ISO has a huge effect on how your final image turns out. Semi-automatic modes are best used when you know attaining good exposure won't be too big of a problem, such as when you're shooting on a sunny day or with flash.
The Beast In The Woods
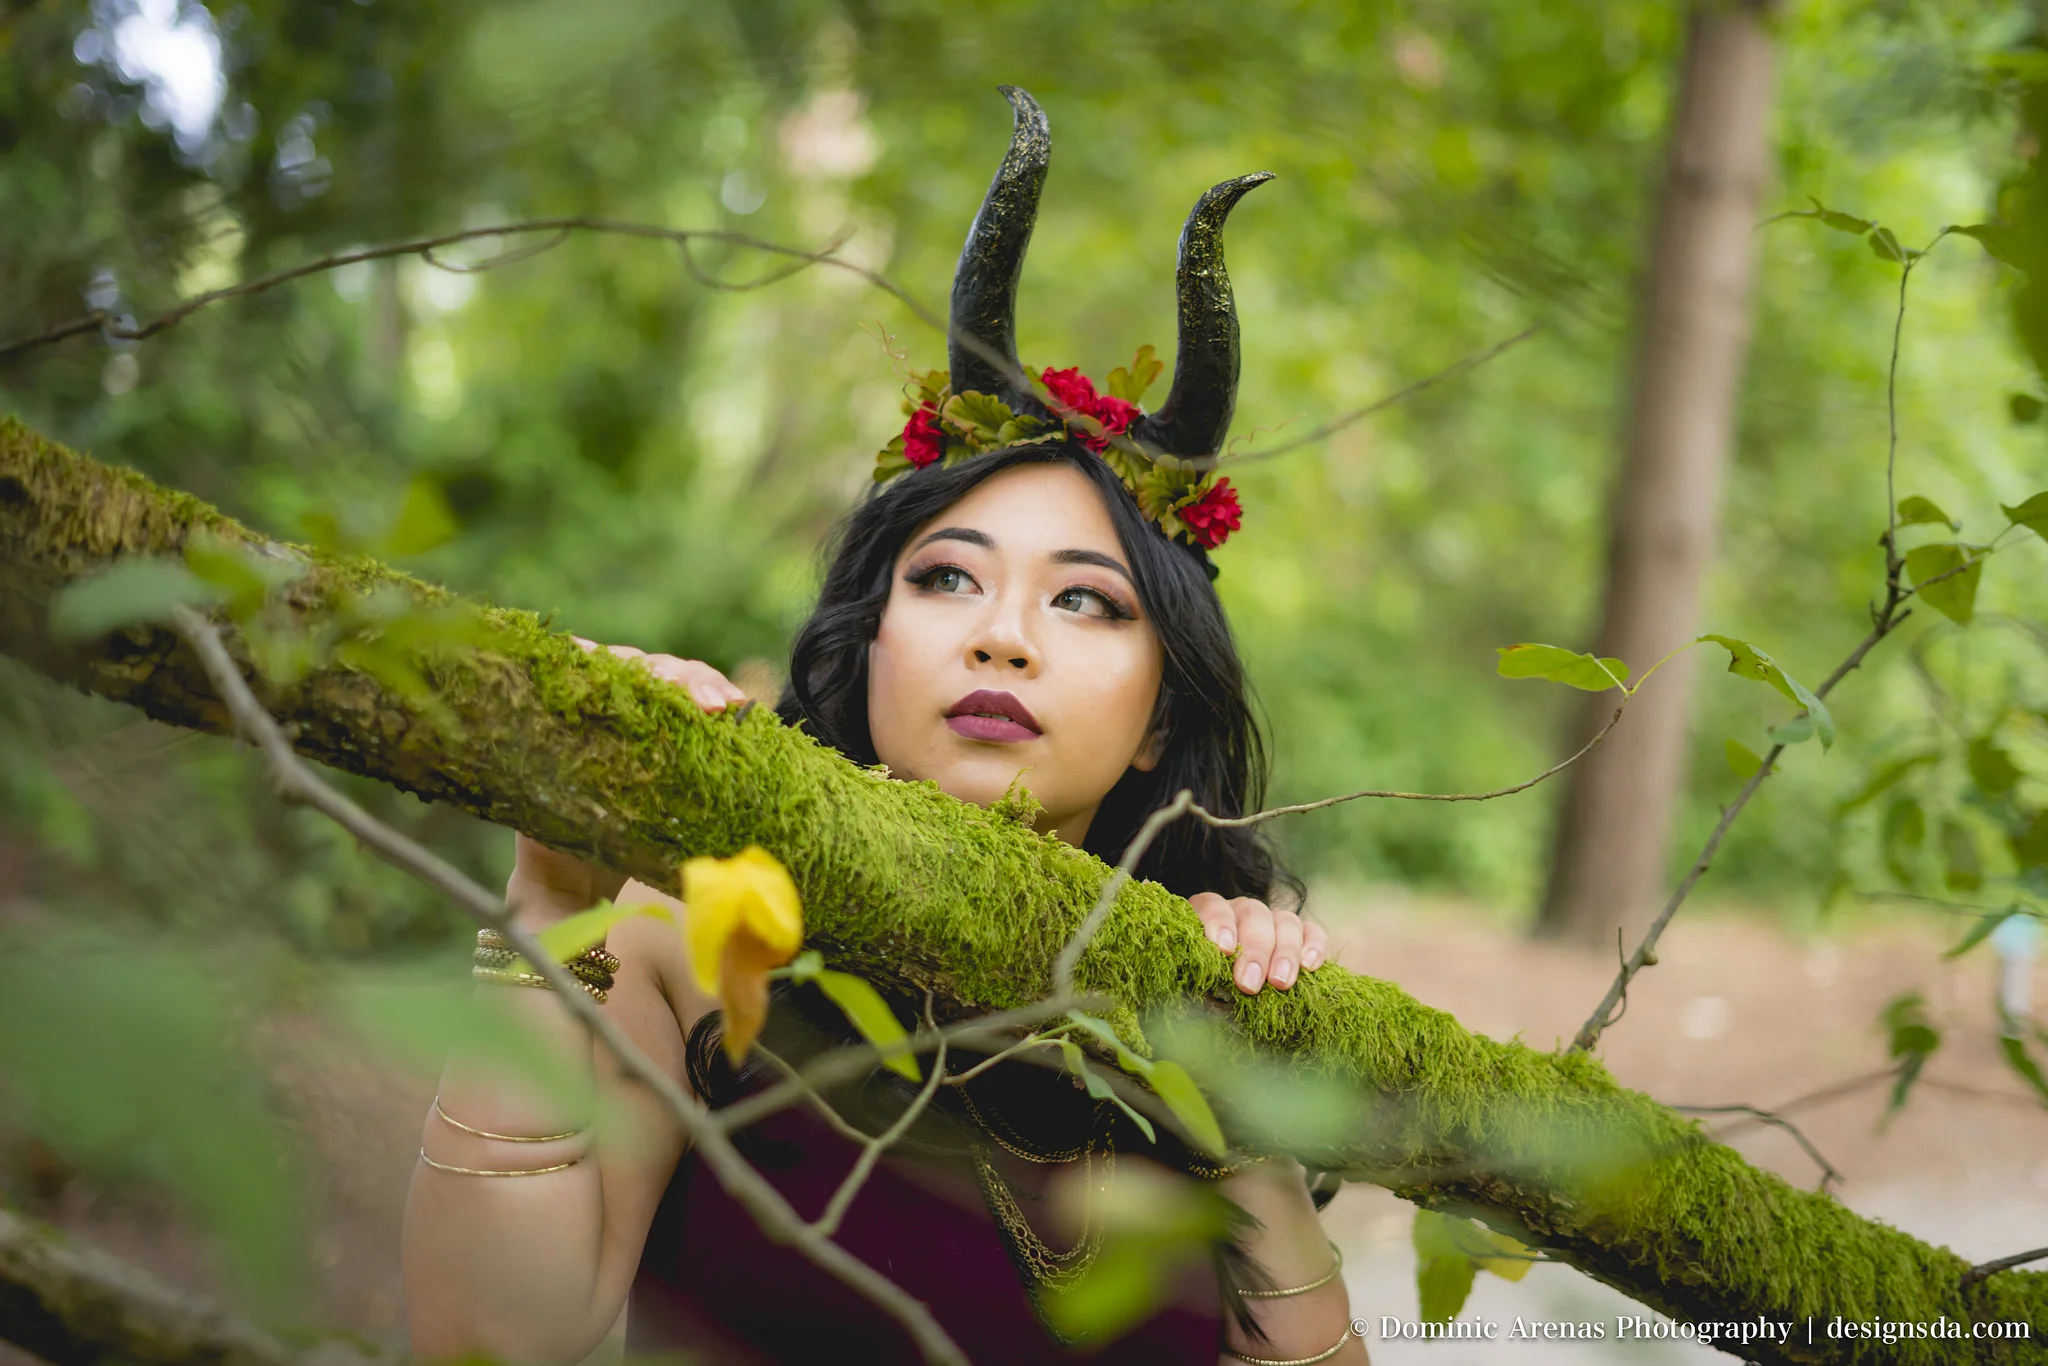
The Beast in The Woods. Also known as Aiko, one of my longtime collaborators. We've worked together on seven(!!!) shoots, and this one is one of my favorites. Not only because the photos have such a personality, but because of Aiko's creativity. She had constructed a pair of horns, to bring an otherwise standard photoshoot into the realm of fantasy. Now, I'm not a huge fan of fantasy, Lord of the Rings, Hobbit type stuff, but I love anything surreal. The juxtaposition of Aiko's horns in what would otherwise be a normal location shoot really cranked me up creatively, especially in the editing process.
A meal for the beast?
Our location was Washington Park Arboretum, a sprawling, tree filled park right on Lake Washington. It was a nice and warm July night, just hours before sunset. Summer's in Seattle, and that sun just keeps going, it feels like it's never going to set. The Arboretum is so dense that the sun was only able to get in through cracks in the canopy. This further added to the surreal feeling, that it was bright in all other places but deep in the woods. Little cracks of sunlight were trying hard to break through, filling the forest with sparks of light.
Painted by the sun.
We shot two looks, the lovely eggplant dress seen above, and a very pure white dress paired with a patterned shawl, which had almost a native feel, if that makes sense. Now, Aiko has a personality, so finding characters and posing inspirations to fulfill the outfits is as easy as putting them on. As I said at the top, we've worked together many many times in the past, so I don't have to do much in the way of direction when it comes to posing, I trust her and the poses that come to her. This is something I slowly learned about working with models, it's really just a matter of personality and experience. It's as much about the photographer becoming comfortable with the model, as it is the model being comfortable with the photographer.
Solar charging.
When I start planning a photoshoot, I like to create a mood board beforehand, something that can be shared with the model, makeup artist, art director, what-have-you. It's a useful tool to portray the possibilities of a shoot, inspirations to aspire to, and even specific looks or styles you'd like to incorporate into the shoot. I use Pinterest, since it's easy to search, you can create a specific board for what you're looking for, and you can easily share it, along with the individual pins. It's even collaborative, so you can take suggestions and work together to make a cool project!
A horned beast surveys the scene from the trees.
I'm not sure if I've mentioned this in past blogs, but one of my in-jokes when I'm on location shoots is that I'm going to somehow end up dead because of the location, that I'll be so focused on shooting that I'll trip and fall down a cliff, or that I'll step back into an oncoming car. Sure, it's pretty morbid, but it's just my humor. Like most potentially awkward situations, humor is great to break the tension, and I'll admit, working with models has the potential to get very awkward. That's why I really don't take myself too seriously when on shoots. I stay focused and serious while behind the camera and actually taking photos, but the other 40% of the shoot, the walking from one location to the next, the outfit changes, I would go absolutely crazy if I remained stoic and thoughtful.
If you acknowledge that photoshoots don't have to be serious stressful affairs, it helps you build a stronger foundation with all those involved, and helps everybody relax and work together to create the best art. Obviously, you won't always be able to work this way, so when you're first starting out and testing with models, keep this in mind. Don't forget, models are people too, and people work together best when they're laid back and chill, and comfortable.
Exposure Part Three: In Search Of... ISO
We've made it to the final chapter of the Exposure Series, where I will explain ISO, and how it works in concert with Shutter Speed and Aperture. Make sure to ready the two previous installments, Exposure Part One: The Almighty Aperture and Exposure Part Two: All About Time AKA The Shutter (Speed), before continuing as this chapter focuses heavily on terms and concepts covered in those previous posts. Now with that out of the way, ISO is an interesting carry over from the days of film. With shutter speed and aperture, the mechanics are identical on a film camera and a digital camera. But since ISO is a quality of film, it's often overlooked when learning about digital photography. Let's remedy that!
Sitting Demon.
Simply put, ISO is the film's (or sensor's) sensitivity to light. To understand ISO from a pragmatic standpoint, we have to think about it in terms of its original application with film, as its usage in digital photography is indicated by its film use. Let's get the name out of the way first, ISO stands for International Organization of Standardization. We refer to ISO in film because there was a point where there were several film sensitivity standards, but ISO became the most widely accepted standard. Now that we know that, it's really not relevant to how film itself works, but it helps you understand a bit of the history of film. So, how does film work? Basically, you have a piece of celluloid with silver grains which are exposed to light, creating an image. If you have film with smaller grains of silver, you get a sharper, finer image. With larger grains, there's less contrast and sharpness, and you get a grainy look, almost as if there were grains of sand or dust on the photograph. Smaller grains take more light or a longer time to expose, and larger grains are able to be exposed with less time or less light.
Stallion.
Knowing the above, how to we apply that to digital photography? Well, the sensor in your digital camera has its own way of affecting exposure, which works differently but in parallel to film ISO. That is to say, the algorithms and machinations of digital sensors are too complicated to cover here, but they play by the same rules as film ISO. Lower ISO values, like 100, are less sensitive to light, but produce a less grainy image. And as you work your way up, the sensor becomes more sensitive, but you'll see noise on your photos, which is the sensor's equivalent to film grain. So, how does that fit into the exposure balance?
Station.
Think about it like this: shutter speed and aperture relate to each other in the same way they relate to ISO. For good exposure, you can change aperture, shutter speed, or ISO. Knowing when to change the right setting is key to creating great images. You may find yourself wanting to take a photo of a scene, and capture every single detail, so you set you camera to f22, but this makes your exposure darker. You have some elements in your scene that are moving, and would create motion blur at lower shutter speeds, so you need to be at least 1/150 shutter speed. At this point, you have the settings you want, but your exposure is still too dark. This is where ISO comes in, it gives you that extra exposure that helps you create the image you want. But don't forget that every time you raise your ISO number, you are increasing the potential noise.
Castle.
Sometimes, you don't want to have to set up your shot, your composition, your shutter speed, aperture, and then ISO if needed, so learning how all of the pillars of exposure interact is key to getting the shot you want quickly. Your camera's automatic mode does something similar by calculating one of the many options for perfect exposure, but it doesn't take in to account your artistic voice. In the last entry, I mentioned that when taking photos of still subjects, you should consider what aperture you should use first, then use shutter speed to compensate for over or under exposure. But now that you understand how ISO works, that is the first thing can consider when shooting, even before you leave your home! If you know that it's a sunny, bright day, you don't need to set your ISO too high. However, if you know that your primary subject will be deep, detailed landscapes, maybe you should set a higher ISO, which will give you more breathing room when it comes to your aperture and shutter speed.
Rainy Days.
Now that you know how all three pillars of exposure work together, and see the delicate balancing act, go out and shoot! Shoot on sunny days and see what settings you choose. Shoot on grey, dreary days; shoot indoors, outdoors! You'll start to visualize what your image's exposure will look like before even hitting the shutter button. As with all things, this takes a lot of practice, so go out there and shoot!
Exposure Part Two: All About Time AKA The Shutter (Speed)
It's time for another installment in the Exposure series, today we'll be discussing shutter speed. Before you continue, be sure to read the first installment, as I'll be referencing how aperture relates to shutter speed. You can find the first part here: Exposure Part One: The Almighty Aperture . Now that that's out of the way, let's get started!
On A Wing...
Shutter speed is the physical speed that your camera opens and exposes its sensor to light. Your camera has a small curtain that lifts when you press the shutter button and closes after a determinate amount of time. Shutter speed is measured in fractions of a second, with most cameras achieving 1/4000th of a second on the fastest end, all the way down to 30 seconds on the slowest end. There's even a way to leave the shutter open for as long as you need, called "Bulb", but we won't get into that today. Most photography will stay within the fractional range, not extending to slower than even 1/30th of a second. When you're outside, you'll find yourself using faster shutter speeds, and slower for indoors shooting. Knowing the proper settings for indoor and outdoor subjects is an important part of good exposure, but knowing when to break the rules is important to finding your voice.
In Motion.
As with aperture, shutter speed has an effect on controlling exposure, but that's not necessarily its intent. Shutter speed is a way to either stop motion, or artistically show motion. When you first start learning photography, you want to adjust your shutter speed so it's fast enough to not capture any motion blur, but slow enough to achieve ideal exposure. Let unpack that term, motion blur; it is blur that appears on your image for one of two reasons. First, if you're taking photos of a living subject, like a model or an animal, small unintentional movements will be picked up at slower shutter speeds. Second, when you hold the camera in your hand, no matter how steady you are, it will pick up your own movement at slow enough shutter speeds. The latter instance is where a tripod comes in handy.
Velocipede.
The relationship between shutter speed and aperture is easy to learn, but difficult to master. One tool that every camera has is the light meter, a built in calculator that determines what the best settings to use in relation to achieve proper exposure. When you look through your viewfinder, you'll see a set of tick marks, with one that moves left or right when you change aperture or shutter speed. The goal is to get the tick mark in the middle, not too far on either side. If your shutter speed is too fast, your photo will come out too dark, underexposed. If your shutter speed is too slow, your photo will come out too bright, overexposed. Most of the time, it's that simple. When you're outside on a sunny day, taking photos of flowers with your aperture at f2.8, your light meter will tell you that your shutter speed should be fast, something like 1/1000. Now, if you change your f-stop to f5.6, you'll notice at shutter speed 1/1000, the exposure is darker. This is how the aperture and shutter speed work together, I like to think of it as a balancing act. As your aperture closes up, you're letting less light in, so how do you compensate? You slow down your shutter speed, allowing more light in over time. You could say it's the relationship of space and time, aperture lets more light to hit the sensor by allowing more coverage, and shutter lets more light in by allowing more time.
Like the movies!
So how to you use aperture and shutter speed together artistically? Well, that's entirely up to you! Think about the relationship, and what you want to show with your image. If you're doing street photography, you might want to keep a relatively broad depth of field, but you want a quick shutter speed so your subject isn't blurry. Same goes for sports photography, if you want to get the moment that foot meets football, focus on having a faster shutter speed, and if your exposure is still too dark, open up the aperture to compensate. If you want to show motion blur, like the above Star Wars reenactment, you'll want to slow your shutter speed to get the cool light trail effect. You'll notice though, that if you're trying to achieve a motion blur effect during the day, your image will only become brighter and brighter as you slow your shutter speed. The best way to compensate is to simply close your aperture, thus darkening your exposure. This is how the balance works, if your exposure is too bright but you want to retain your shutter speed, change your aperture. Same goes for if your exposure is too dark, open the aperture to get more light hitting the sensor. Keeping in mind this balance will help you immensely, especially when your vision calls for certain settings, but your exposure just isn't what you want it to be.
Too slow!
I hope this installment was helpful, stay tuned for next week, where I'll be explaining ISO, the final pillar of Exposure, and how all three pillars work together to help you create the best photos! Please sound off in the comments if you have any questions, thoughts, comments!

